Euro Travel & Freight ~
~ 

If you would like a high quality resolution picture, e-mail me at
evandendijck@elp.rr.com (refer to the BrainBox.xls
for file size).
New Items on: Bottom of Page = New Items
To: Euro
T&F Links ~~~>
To: Euro T&F 005 ~~~> This
page is Euro T&F 006
To: Euro T&F 007 ~~~>

01/13/17 ~ Windmill "The Cat" with motor: Roof with the front and back trim.
01/16/17 ~ Windmill "The Cat" with motor: Temporary placement of the walkway
onto the building.

01/20/17 ~ Windmill "The Cat" with motor: The walkway with guard rail
supports installed (No. 24 is missing).

01/28/17 ~ Windmill "The Cat" with motor: The walkway with guard railing
installed.

02/05/17 ~ Windmill "The Cat" with motor: The walkway with support system
installed.

02/05/17 ~ Windmill "The Cat" with motor: Permanent placement of the
completed walkway onto the building.

02/08/17 ~ Windmill "The Cat" with motor: The windmill substructure.

02/08/17 ~ Windmill "The Cat" with motor: The windmill superstructure:
components. /// 02/09/17 ~ The windmill superstructure: assembled.

02/09/17 ~ Windmill "The Cat" with motor: Temporary [?] placement of
windmill superstructure on top of the building.

02/12/17 ~ Windmill "The Cat" with motor: Sail turntable without and with
motor.

02/17/17 ~ Windmill "The Cat" with motor & The Outhouse.

02/18/17 ~ Windmill "The Cat" with motor: The weathervane and winch.

02/25/17 ~ Dx-Port In & Dx-Port Out: Placement of the mounting bracket.

03/01/17 ~ Levelground /// 03/07/17 ~ Camera 01 Underground & Monitor 01.

03/13/17 ~ Water 01: Due to the angled abutment wings, there is still
exposed Stud Ultrasteel.

03/13/17 ~ Water 01: Installation of 2* 50 mm Pine Latt.

03/13/17 ~ Water 01: Installation of Molding Shoe.

03/14/17 ~ Water 01: Installation of Molding Shoe: complete.

03/15/17 ~ Dx-Port Out: Secure Rail Straight Convert M~>K with Screw Metal.
03/17/17 ~ Switch Toggle 027 [Dx-Port In~Out] Frankenstein: Indicate
positions.

03/17/17 ~ Dx-Port In with mounting plate and Lamp Holder Red 002.
03/17/17 ~ Dx-Port Out with mounting plate and Lamp Holder Red 003.

03/23/17 ~ Cable010: Adding one more strand for Switch Toggle 027
Indicator-AC Supply.

03/23/07 ~ Switch Toggle 027 "Frankenstein" ~ In and Out Operation: Lamp
Holder Red 002 & Lamp Holder Red 003.

03/31/17 ~ CB023: Installation of BS042, Xfmr 016 & Xfmr 017.
04/18/17 ~ Install BS041 onto CB019 = To connect more Xfmr ~ AC-utility.

10/11/17 ~ DYMO LetraTag with AC Adaptor /// AC-Outlet 007 & 010 Labeling.

10/14/17 ~ BS041 connection to Xfmr 014 Primary.

1016/17 ~ Woodland Scenics, Tunnel Portal, Timber, Single Track & Retaining
Walls, Three Timber Sections =
to go to the Underground Shadow Station.

10/16/17 ~ Tender Locomotive Steam ~ KLVM, Well car with BAHIA crate & Crane
car. /// 10/17/17 ~ 26 new cars.

10/21/17 ~ Train D005 BR74 (German Freight, Cooler / Container): provisional
car storage.
10/22/17 ~ Stud Ultrasteel 03: drill a feed-through hole in Plank 15 for
Control Panel Auxiliary 01 wiring.

10/22/17 ~ Stud Ultrasteel 03: drill a feed-through hole in Plank 15 for
Control Panel Auxiliary 01 wiring.

10/22/17 ~ Stud Ultrasteel 03: install BS043 ~ BS044 ~ BS045. /// 10/23/17 ~
TP030 and phasing test on CB020.

10/23/17 ~ CB023 connected to CB019. /// 10/26/17 ~ Plank 17: Install Anna's
Linens: Cover Curtain Rod 87 Vanilla with Spax: Screw Ph2.
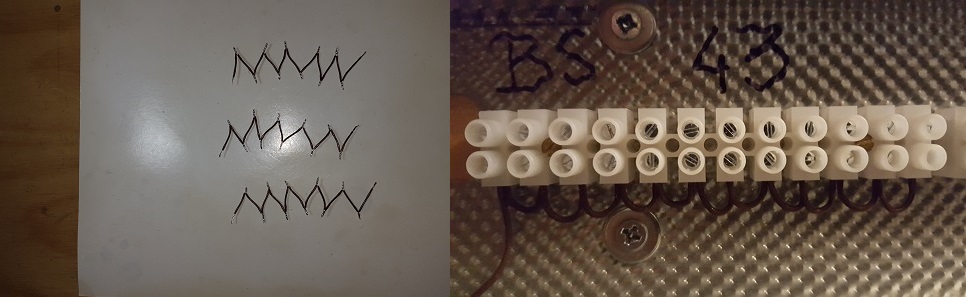
10/26/17 ~ Stud Ultrasteel 03: Prep Jumpers for BS043 ~ BS044 ~ BS045. ///
10/27/17 ~ BS043-01~12 connect with BS035-10.

10/28/17 ~ BS044-01~12 connect with Switch Slide 013. /// BS045-01~12
connect with Switch Slide 014.
CB020: Scope: Ph-002 is IN-Phase with Ph-000. /// CB020: Scope: Ph-003 is
IN-Phase with Ph-000.

10/29/17 ~ Control Panel Auxiliary 01: BS043-01 = TP031 / BS044-01 = TP032 /
BS045-01 = TP033. /// Windmill "De Kat" is running.

10/31/17 ~ Train C002 Railbus: with 2nd trailer.
11/01/17 ~ Train C002 Railbus: Apply semi-permanent copper-wire to the
Close-couplings of both Trailers.

11/04/17 ~ Faller 120181 Bahnsteig ~ Platform ~ Quai ~ Perron: molded sprues.

11/05/17 ~ Faller 120181 Platform: Print Label [DYMO LetraTag = Small, Bold,
Borders] "NIEDLINGEN". /// 11/05/17 ~ Install "NIEDLINGEN".

11/06/17 ~ After the removal of the bottom edges of the platform floor, it
fits in between Blok005 & Blok013.

11/08/17 ~ Mark platform staircases with pencil. /// 11/08/17 ~ Assembling
benches 4*.

11/08/17 ~ Join the two platform roof parts (using custom joiners).

11/12/17 ~ Calipers Ø of Mini Toggle Switch SPST & Hanger Bolts.

11/12/17 ~ Control Panel Auxiliary 01 with mounting holes.

11/12/17 ~ Install template inside of Stud Ultrasteel 03. /// Control Panel
Auxiliary 01 fit onto the 6* Hanger Bolts.

11/14/17 ~ Connect Commons Switch Toggle 074~083, 084~093, 094~103, 104~113.
Control Panel Auxiliary 01: Faller 377 Windmolen "De Kat" met motor is
running.

11/17/17 ~ Platform: cut out and blacken the staircases.

11/17/17 ~ Double-Track Truss Bridge Abutment Wings: trim.

11/17/17 ~ Double-Track Truss Bridge Headers: trim.

11/18/17 ~ Platform: glue Board "NIEDLINGEN" to staircase guard. ///
11/19/17 ~ Glue 4* Benches onto platform floor.

11/19/17 ~ Platform: post installed into platform floor. /// 11/19/17 ~
Platform: post with roof cross supports.

11/19/17 ~ Platform: post with roof cross & long supports. /// 11/20/17 ~
Completed platform.
To: Euro
T&F Links ~~~>
To: Euro T&F 005 ~~~> This
page is Euro T&F 006
To: Euro T&F 007 ~~~>
